Step 2: Connect Your App to BigCommerce
In this step, you connect your app to the BigCommerce ecosystem embedding it into Draft Apps.
Install node-bigcommerce
To authenticate and use your app with the BigCommerce API, install BigCommerce's in-house node-bigcommerce module (GitHub) (opens in a new tab).
npm install github:bigcommerce/node-bigcommerceView tested package versions
You can view a list of all the tested package versions in the package.json file on the Step 2 branch (opens in a new tab) of this sample app's repo.
Setup the auth lib page
-
In the root directory of your app, create a
libfolder. -
In the
libfolder, create anauth.tsfile. -
Open the
auth.tsfile and add theBigCommerceimport at the top of the file.
import * as BigCommerce from 'node-bigcommerce';- Create a BigCommerce instance required as part of the authorization step when first installing the application.
// Create BigCommerce instance
// https://github.com/bigcommerce/node-bigcommerce/
const bigcommerce = new BigCommerce({
    logLevel: 'info',
    clientId: process.env.CLIENT_ID,
    secret: process.env.CLIENT_SECRET,
    callback: process.env.AUTH_CALLBACK,
    responseType: 'json',
    headers: { 'Accept-Encoding': '*' },
    apiVersion: 'v3'
});

const bigcommerceSigned = new BigCommerce({
    secret: process.env.CLIENT_SECRET,
    responseType: 'json'
});

interface QueryParams {
    [key: string]: string;
}
The bigcommerceSigned function is called when loading or uninstalling the application.
- Export the
getBCAuthfunction.
export function getBCAuth(query: QueryParams) {
    return bigcommerce.authorize(query);
}
You use the authorize method for the /auth API endpoint which gets called when you install or update the app. The authorize method retrieves your permanent access token and returns it in the data object.
- Export the
getBCVerifyfunction.
export function getBCVerify({ signed_payload_jwt }: QueryParams) {
    return bigcommerceSigned.verifyJWT(signed_payload_jwt);
}
The verifyJWT method employs the signed_payload_jwt query parameter to authenticate requests. You use the verifyJWT method for both /load and /uninstall API endpoints. To learn more about the OAuth flow, see Single-Click App OAuth Flow.
You can view auth.ts (GitHub) (opens in a new tab).
Add API endpoints
Next.js maps all APIs that are part of the Next.js application to the /api/* route. You can take advantage of it by creating a sub-directory within the pages folder called api. This signals Next.js to treat files within /pages/api as API endpoints and automatically handle their routing. To learn more about Next.js API routes, see API Routes (opens in a new tab).
-
In the
pagesfolder, create anapifolder. -
Open the
apifolder and add the following files:auth.ts,load.ts, anduninstall.ts. -
Open the
auth.tsfile and add the logic to authorize the app. You can view auth.ts (GitHub) (opens in a new tab).
import { NextApiRequest, NextApiResponse } from 'next';
import { getBCAuth } from '../../lib/auth';

export default async function auth(req: NextApiRequest, res: NextApiResponse) {
    try {
        // First, authorize the application
        // req.query: query param passed from the Control Panel to your app
        await getBCAuth(req.query);
        // Once the app has been authorized, redirect to the homepage (/pages/index.tsx)
        res.redirect(302, '/');
    } catch (error) {
        const { message, response } = error;
        res.status(response?.status || 500).json({ message });
    }
}
The /auth endpoint gets called when installing the app. Launching (loading) or uninstalling the app will not call the /auth endpoint.
- Open the
load.tsfile and add the logic to sign the user in when the app calls the/loadendpoint (when launching the app). You can view load.ts (GitHub) (opens in a new tab).
import { NextApiRequest, NextApiResponse } from 'next';
import { getBCVerify } from '../../lib/auth';

export default async function load(req: NextApiRequest, res: NextApiResponse) {
    try {
        await getBCVerify(req.query);

        res.redirect(302, '/');
    } catch (error) {
        const { message, response } = error;
        res.status(response?.status || 500).json({ message });
    }
}- Open the
uninstall.tsfile and add the logic to remove a user who has uninstalled the application from their BigCommerce account. You can view uninstall.ts (GitHub) (opens in a new tab).
import { NextApiRequest, NextApiResponse } from 'next';
import { getBCVerify } from '../../lib/auth';

export default async function uninstall(req: NextApiRequest, res: NextApiResponse) {
    try {
        await getBCVerify(req.query);

        res.status(200).end();
    } catch (error) {
        const { message, response } = error;
        res.status(response?.status || 500).json(message);
    }
}
Create an HTTPS tunnel
To connect your sample app to BigCommerce, you need a publicly accessible URL. To add network access while still in the development phase, you can use ngrok (opens in a new tab), a free tool that lets you expose local servers like localhost:3000 to the public internet over secure tunnels.
- Open a new terminal window and install ngrok (opens in a new tab) using Homebrew.
brew install ngrok/ngrok/ngrok
ngrok config add-authtoken <TOKEN>
You can obtain your authtoken by going to https://dashboard.ngrok.com/get-started/your-authtoken (opens in a new tab).
- Expose the web server to the internet.
ngrok http http://localhost:8080 # Start the app- You should see the ngrok web interface. Copy the HTTPS tunnel URL and keep the app running. Your terminal should display a message similar to the following:

Ngrok configuration
Although you can use the ngrok npm package without creating an account, any unauthenticated tunnels you create will expire after two hours. For the best development experience, create a free ngrok account (opens in a new tab), find your ngrok authtoken (opens in a new tab), and add the authtoken (opens in a new tab) to your global ngrok configuration.
Register the draft app
To register an app, you need a BigCommerce store. If you do not have a BigCommerce store, visit the BigCommerce Pricing (opens in a new tab) page to start a free trial.
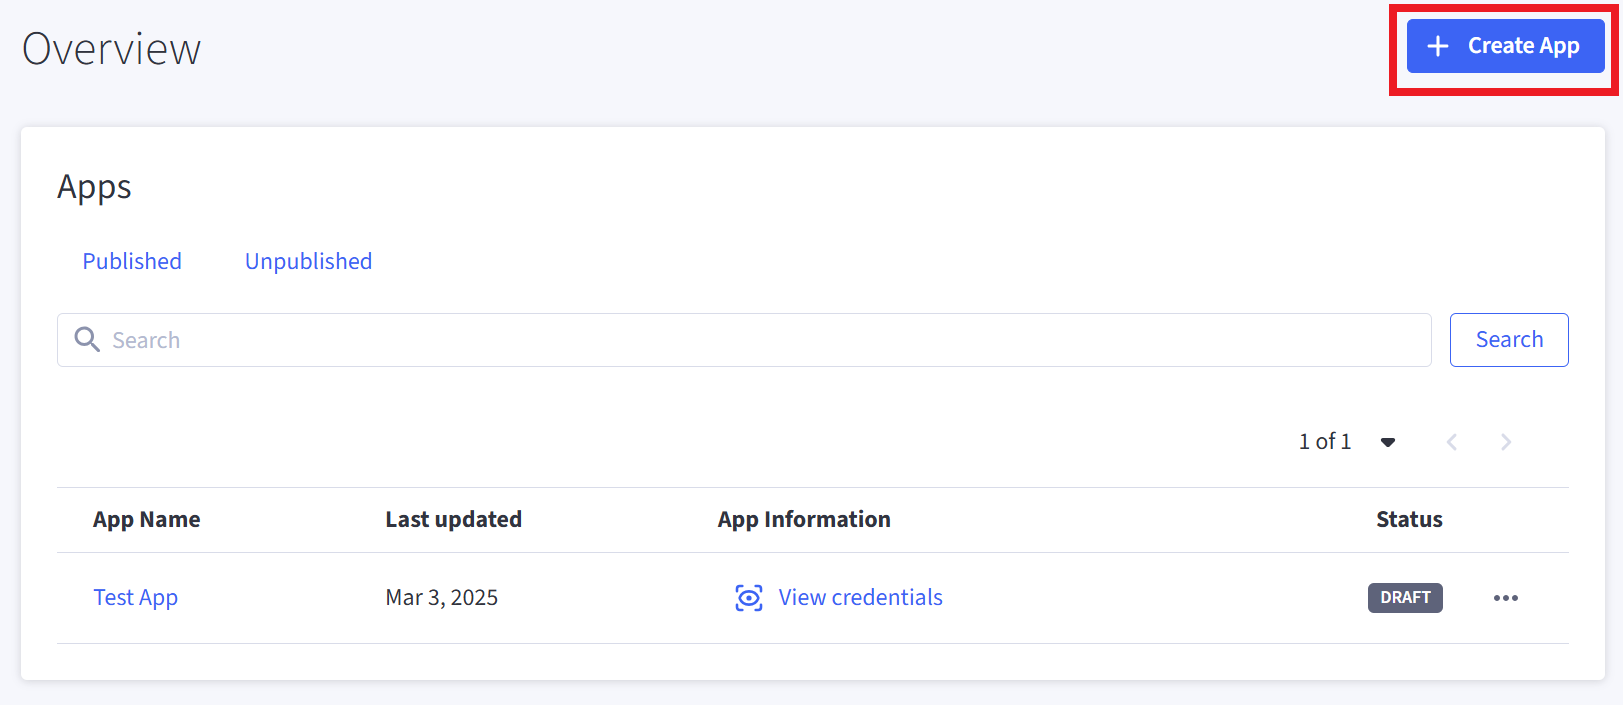
- In your Developer Portal (opens in a new tab) account, click Create an app.

-
Enter app details at the prompts. Because you are building a sample app, you can name it anything you want. Production-level apps should meet the general requirements outlined in Approval Requirements.
-
Click Technical.
-
Under App Features, select STORE OWNER for Multiple Users and SINGLE-CLICK for App Type.
-
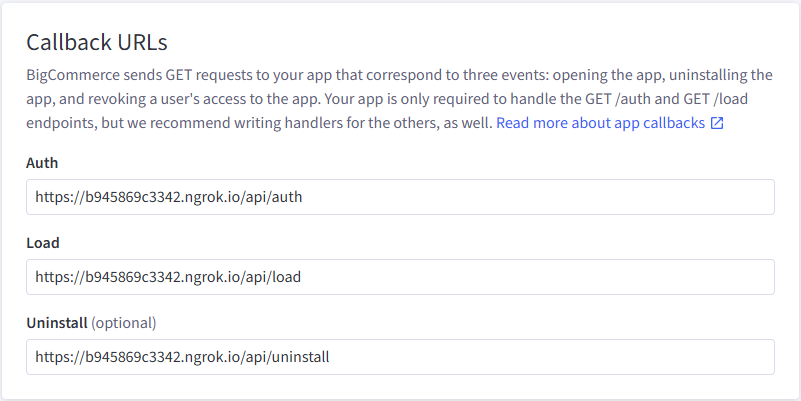
To fill out Callback URLs, retrieve the public HTTPS URL of your ngrok tunnel.

- For Auth Callback URL, enter the ngrok URL of your app followed by
/api/auth. - For Load Callback URL, enter the ngrok URL of your app followed by
/api/load. - For Uninstall Callback URL, enter the ngrok URL of your app followed by
/api/uninstall.

Next.js route mapping
Next.js maps all APIs that are part of the Next.js application to the /api/* route. To learn more about Next.js API routes, see API Routes (opens in a new tab).
- Because you will be modifying the Products API resource, set the Products OAuth scope to MODIFY. To learn more about the available OAuth scopes, see OAuth scopes.

-
Click Update & Close.
-
Select Confirm Update.
You should see your app listed under My Apps in your Developer Portal account.
Add your client ID and client secret
It is best practice to declare environment variables in the .env environment file. You use the .env file to store your Client ID and Client Secret Key.
Next.js comes pre-equipped to handle environment variables. It loads environment variables from .env.local into process.env, allowing you to use them in Next.js data fetching and API routes. To learn more, see Next.js Environment Variables (opens in a new tab).
-
Create an
.envfile in the root directory of your app. -
Add the app's credentials and auth callback placeholders to the
.envfile.
CLIENT_ID={app client id}
CLIENT_SECRET={app secret}

AUTH_CALLBACK=https://{ngrok_url}/api/auth

# Most users do not need to change this
API_URL=api.bigcommerce.com- Navigate to Developer Portal > My Apps (opens in a new tab). Locate your app and click View Client ID to retrieve your app's credentials.
- Copy the app's client ID and client secret and paste them into the
.envfile. - Update
AUTH_CALLBACKin.envwith your{ngrok_url}. Becauseenvvariables are loaded on build, make sure to save your changes. - Switch to the terminal window where the dev server is currently running and restart the dev environment.
npm run devInstall and launch the app
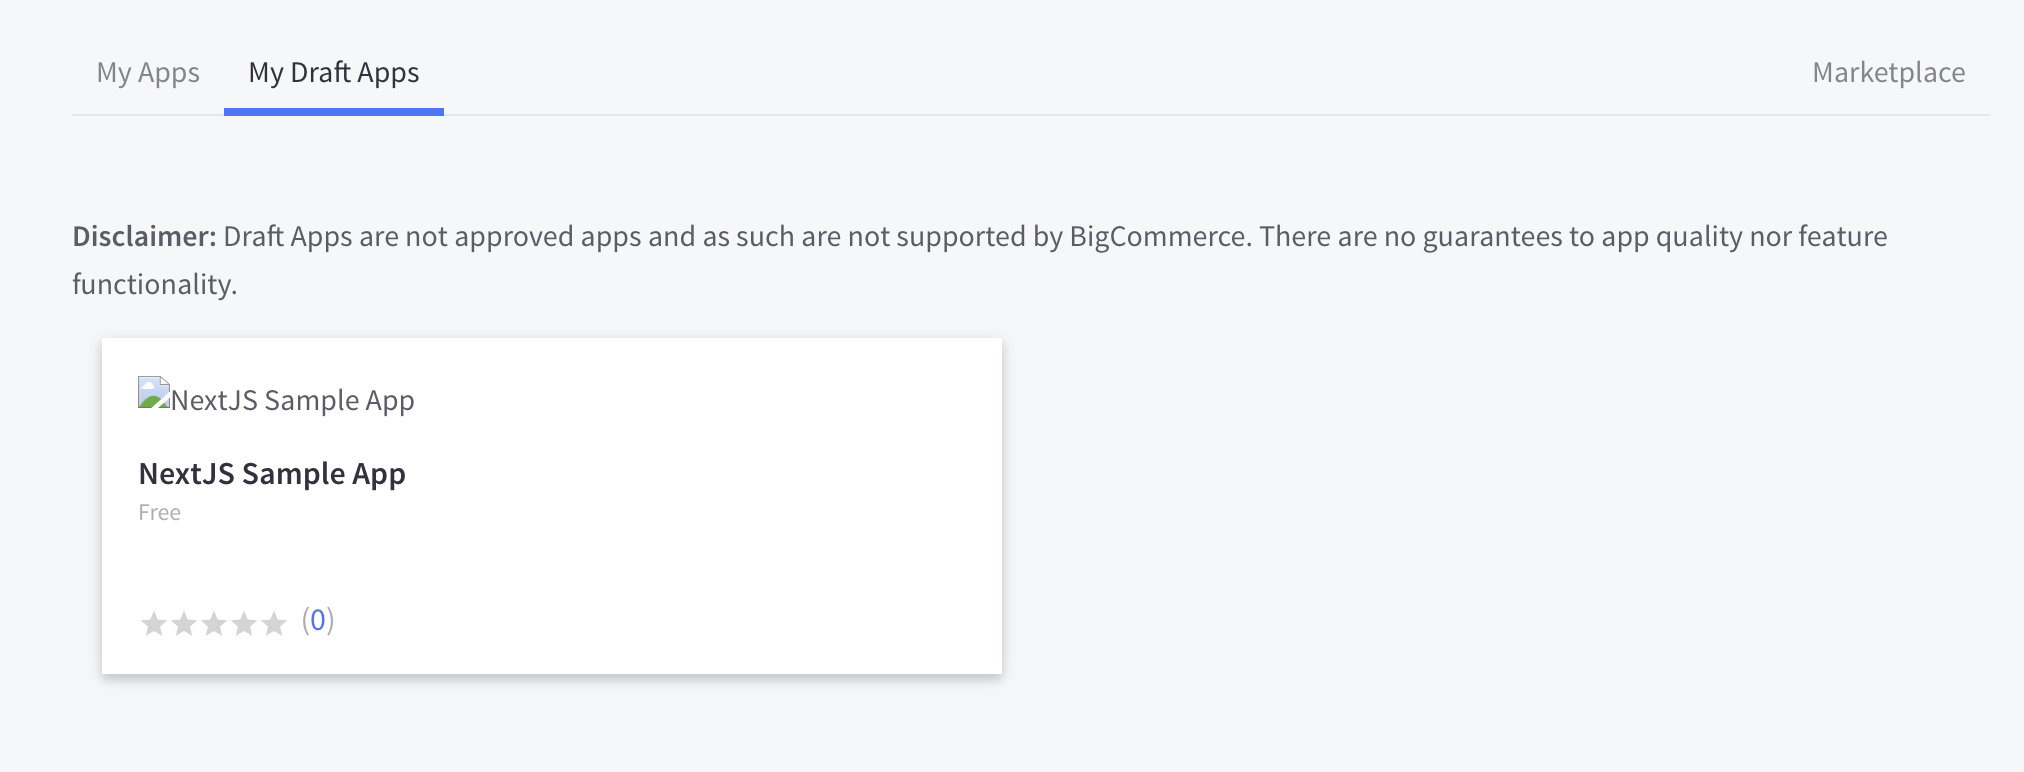
- Sign in to your BigCommerce store and navigate to Apps > My Apps > My Draft Apps (opens in a new tab). You should see your new app displayed under My Draft Apps.

-
Click the app's name.
-
Click Install.
-
Click Confirm.
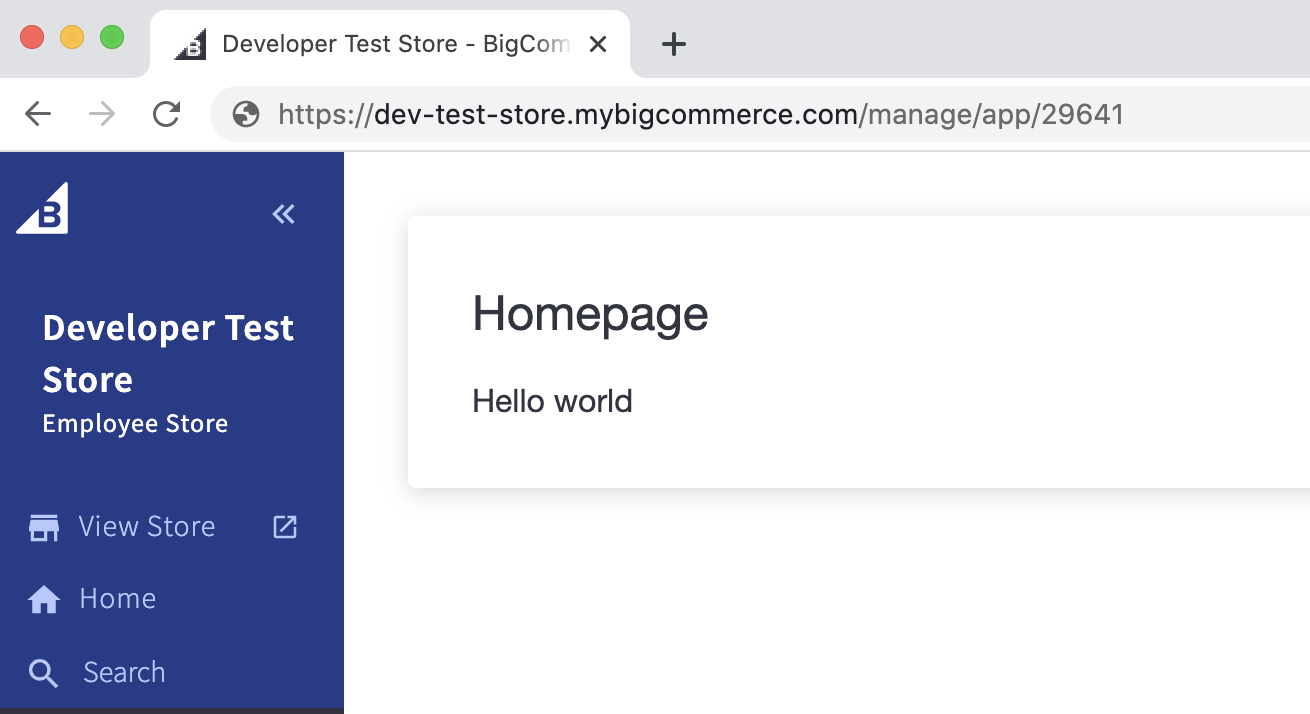
You should see your app embedded in the BigCommerce platform.

Next: Integrate the BigCommerce API and Add a Database